Cinder block walls are stapled in many homes, especially basements and exterior foundations. They’re sturdy, durable, and long-lasting, but like any material, they’re not immune to wear and tear. Over time, moisture, temperature fluctuations, and general aging can cause the mortar between the blocks to deteriorate, leading to cracks, crumbling, and even potential structural issues. If left untreated, these minor problems can become major headaches, potentially costing you hundreds or even thousands of dollars in repairs. The good news is that repairing a crumbling cinder block wall is easier than you might think, and taking action early can save you from more significant, more expensive repairs.
In this guide, we’ll walk you through how to repair crumbling cinder block wall sections, providing all the tips and techniques you need to restore your walls and keep your home safe.
Why Do Cinder Block Walls Crumble?
Before diving into repairs, it’s essential to understand why cinder block walls can start to crumble in the first place. Several key factors contribute to the breakdown of these walls:
- Moisture Exposure: Over time, water can seep into the mortar and cinder blocks, causing the material to weaken and crack. This can be a significant issue in areas like basements or exterior walls, where moisture is more common.
- Freeze and Thaw Cycles: In colder climates, water trapped within the cinder blocks can freeze, expand, and crack the mortar. When the ice thaws, the process repeats, causing further damage.
- Poor Initial Construction: If your cinder block wall wasn’t properly constructed, it could be more susceptible to damage over time. Issues like improper mortar mix or inadequate sealing can lead to premature deterioration.
- General Wear and Tear: Over the years, constant exposure to the elements and the natural aging process can cause the mortar to break down and crumble.
No matter the cause, if you’ve noticed any signs of damage, such as cracks, soft spots, or chunks of mortar falling out, it’s time to take action and repair your crumbling cinder block wall.
Step-by-Step Guide to Repairing Cinder Block Walls
Repairing a crumbling cinder block wall may sound daunting, but it’s a manageable task for homeowners with basic DIY skills. Here’s a step-by-step breakdown of how to repair crumbling cinder block walls effectively:
Step 1: Assess the Damage
Start by scrutinizing your wall. Look for visible cracks, gaps, or missing mortar between the blocks. Check for areas that feel soft or crumbly to the touch, which could indicate more significant damage. The goal here is to determine how much damage needs to be repaired. Small cracks can usually be fixed with a simple mortar application, but more significant issues require more extensive work.
Step 2: Gather Your Tools and Materials
To repair a crumbling cinder block wall, you’ll need a few essential tools and materials:
- Mortar mix: You must mix your mortar to fill the cracks and gaps. Look for a high-quality masonry mortar mix suited for the type of wall you’re repairing.
- Trowel: This is essential for spreading and smoothing the mortar.
- Wire brush: A wire brush helps clean the joints before applying the new mortar.
- Chisel and hammer: You’ll use these to remove any old, deteriorated mortar.
- Bucket: To mix the mortar.
- Protective gloves and safety goggles: Always wear these to protect yourself from dust and debris.
Once you have everything ready, you can start the repair process.
Step 3: Clean the Wall Surface
Before applying new mortar, it’s essential to clean the affected area. Use a wire brush to scrub any loose, crumbling mortar from the joints. You want to remove all debris and old mortar to ensure the new mortar will bond properly. If the area is filthy or has built-up grime, you may want to use a damp sponge to clean it further.
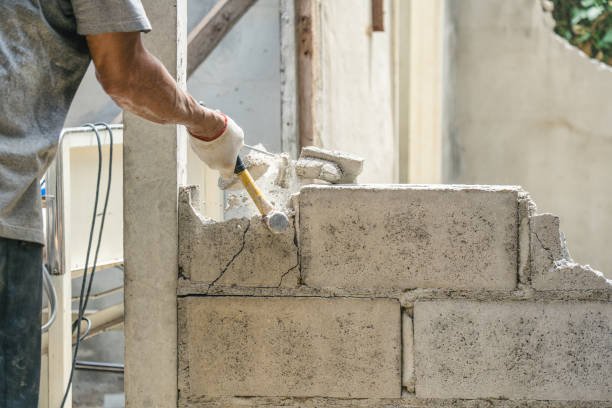
If you’re dealing with large cracks or holes, using a hammer and chisel is best to remove any loose, damaged mortar around the cracks. Be careful not to damage the cinder blocks themselves as you work.
Step 4: Mix the Mortar
Next, mix your mortar according to the manufacturer’s instructions. The mortar should have a thick, peanut-butter-like consistency, making it easy to apply but firm enough to stay in place once it’s in the cracks and gaps. Avoid making the mixture too runny, as this can weaken the bond and make it harder to work with.
If you’re repairing multiple areas, you may need to mix additional batches of mortar as you go.
Step 5: Apply the Mortar
Now, it’s time to start repairing your crumbling cinder block wall. Use your trowel to apply the mortar to the joints and cracks in the wall. Start from the bottom and work your way up, filling the gaps. Press the mortar into the crack and smooth it with the trowel’s edge for small cracks. Ensure to overfill the crack slightly, as the mortar will shrink as it dries.
Apply it generously and press it firmly for more significant gaps or missing mortar areas. Smooth the surface with the trowel, ensuring the mortar is level with the surface of the cinder blocks.
Step 6: Smooth the Joints
Once the mortar has been applied, use the trowel to smooth the surface and create uniform, even joints. The mortar should be slightly recessed below the surface of the cinder blocks to create a clean, professional finish. Use a damp sponge to smooth out any rough edges and remove excess mortar.
Remove any excess mortar from the cinder blocks themselves before it dries. Once it hardens, it can be difficult to remove.
Step 7: Let the Mortar Cure
Allow the mortar to cure for at least 24 hours before touching or disturbing the area. During this time, keep the area dry and avoid contact with the repaired joints. If the weather is particularly hot, you may need to dampen the mortar slightly to prevent it from drying out too quickly.
Step 8: Seal the Wall (Optional)
Once the mortar has fully cured, consider applying a masonry sealer to protect your newly repaired cinder block wall from water damage. A sealer helps prevent moisture from seeping into the wall and causing future problems. Be sure to choose a high-quality, breathable sealer designed for masonry surfaces.
Tips for Maintaining Your Cinder Block Wall
- Inspect Regularly: Even after repairs, it’s essential to regularly inspect your cinder block walls for any new cracks or signs of wear. Early detection will allow you to address issues before they become significant problems.
- Prevent Water Damage: If your wall is exposed to moisture, consider installing proper drainage or improving your home’s waterproofing to prevent water from damaging the mortar and blocks again.
- Touch Up as Needed: Over time, you may need to touch up small areas of mortar that have cracked or fallen out. Regular maintenance will help keep your wall in good condition.
A crumbling cinder block wall doesn’t have to be a source of stress. With a bit of time and effort, repairing a crumbling cinder block wall is a straightforward task that can significantly improve the stability and appearance of your home. By taking care of minor issues early on, you can prevent more extensive, more costly repairs. Whether dealing with minor cracks or more significant gaps, following these simple steps will ensure your cinder block wall stays strong, safe, and functional for years.